To those that think cooking a juicy, flavorful, well-seasoned, highly delicious piece of meat easy…you’re right.
Time and again I get asked; “what do you put on your steak?” The answer is always the same…kosher salt and coarse ground pepper. That doesn’t mean that other seasonings are bad or that you can’t use sea salt. Salt and pepper are maximize flavor without muddling the flavor of the meat.
I don’t cook a steak at home often enough to need added interest from spice rubs and marinades. I just want all my taste buds focused on the gloriousness that is high quality beef fat.
Since fat is what turns on the drool faucet, the most flavorful cuts are ribeye (when price is no option), and skirt. Skirt has so much marbling that when cooked to well done, it’s still moist and Mcfatty delicious.
This chef is of the opinion that most rare steaks are not Scottish. With love of fat being the focus, I need the fat to heat and render through the steak, which takes more time then rare will usually allow.
First, some basic guidelines:
- Heavily marbled steaks or steaks where fat is coveted, should be cooked to the medium side of medium rare or the rare side of medium, (as explained earlier).
- If you are cooking a lean steak like flank, top round, filet and flat iron; ensure that it’s not cooked past medium.
- Cooking surface should be hot. Hotter then most of you might be used to, or comfortable with.
- Dense and/or heavy cooking surfaces are best.
- Seasoning ahead of time, is either a couple hours ahead or right before.
- Cooking steak is better if one hand is occupied by a glass of wine or a good beer.
- Cooking indoors needs a decent vent hood or a stoned fire alarm.
- Flipping a steak prematurely is immature
- Flipping and rotating are not the same thing
- Gray is not the same as browned, and cooked is not the same as browned
- Browned means caramelized, caramelized means ohm, nom, nom.
- Gray = steamed. Steamed steak = :-(
- If major flare ups occur, a spray bottle is nice to have on hand…in a pinch (serious emergency), you can thumb spray a shaken beer.
There are two convenient preparations for cooking steak. Using an outdoor grill and using a sauté pan. The pan method is faster and easier, but dirtier and void of charcoal or fire “flavor”.
GRILL
For charcoal it’s really nice to have a chimney starter, Kingsford Original or Competition briquettes and “Weber paraffin wax fire starters” which can be found at Home Depot. Notice the specificity on the charcoal and the fire starters. Kingsford cooks and starts more evenly, while the wax starters make lighting absolutely stupid simple. Sure, you can use rolled up newspaper; but you usually need to do it twice and it creates a lot of unneeded ash.
For a charcoal chimney. Add charcoal to chimney, place and light a starter underneath. In about 15 minutes the billowing smoke will have dissipated, and fire will be seen out the top of the chimney. Pour charcoal into grill, spread them out and cover with the grill grate to heat up. Once the grate is on, you’re at the same point as 7-10 minutes into preheating a gas grill.
Once the grill grates are hot, brush with a wire brush, then oil the grates, brush again and oil again. The second time is to ensure a clean, oiled surface if you started with a gnarled grate. I use spay oil but if I’m out, I’ll oil a paper towel.
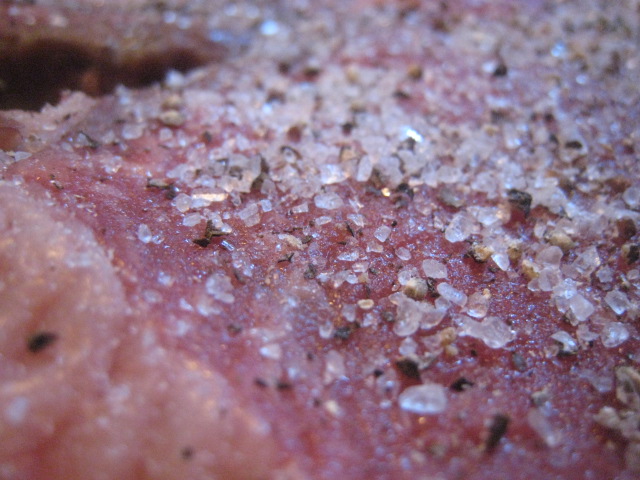
Blot the steaks with a paper towel to remove excess moisture, then season liberally with pepper and salt. Salt so heavily that you’re questioning, and remembering, your last blood pressure reading. Alot of the salt gets lost in the process, and animal fat loves salt. So, hook it up. Also, lightly oiling a steak before seasoning is necessary for lean cuts but not advised for fatty ones.
Finally
Place your seasoned steak on the hot grill surface. Cooking on the grill is fun and sometimes exciting, but like anything else, benefits from practice and familiarity. Remember to use your eyes and nose; your goal is to only think about one side of the steak at a time.
If your insufficient heat and sticking meat are telling you not to turn yet. Don’t touch it. Leave it alone and don’t “play” with it, (which cools down the grates and the steak). If you have good heat, the actual cooking process takes about 10 minutes.
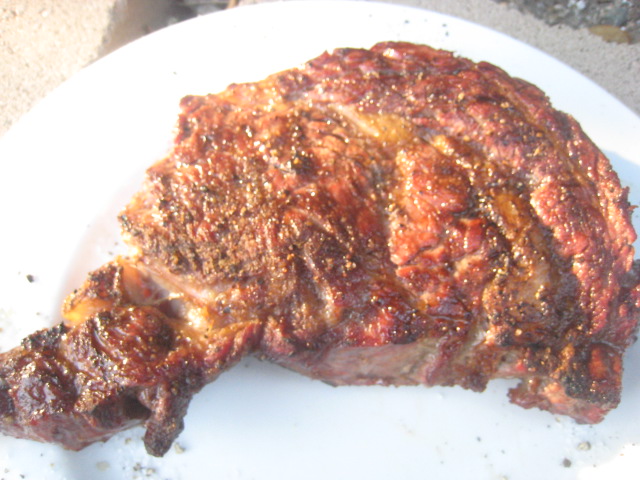
The importance of high heat is so your steak browns before it cooks. Meat is wet and dense. If you don’t get a good early sear or crust on the steak, it will likely bleed out its moisture, then steam and seize. Seized, overcooked, gray meat ensures no friends coming over for future BBQ’s.
So, your steak is on the grill. It shouldn’t stick, if it is sticking, it’s not ready to touch and/or your surface is not hot enough…another reason a hot surface is required.
Once the steak is easily lifted from the grill, feel free to rotate it two or three times over the next several minutes to achieve more even browning on the surface. After the steak looks browned and awesome, flip it.
At this point, flare ups can really start occurring, so have a spray bottle at the ready.
Continue cooking for 3/4 time or equal time as the first side. Aways less with thinner cuts. Checking for doneness is something you’ll have to learn, there are a few variables to think about. Thickness, temperature of raw steak, temperature of fire, density of cooking surface, manipulation during cooking, weather, blah blah blah. Or buy a good thermometer.
Rest it
Resting IS important and should not be overlooked. Place the steak on a plate (hot side up) and either lightly tent with foil or place in a warm area; I put mine in the microwave. Resting allows the hot moisture to settle down and find a home. Cutting too early lets the hot running moisture escape.
PAN
When using a sauté pan you need something heavy that can retain heat, not warp under extreme heat and have an oven proof handle.
I use cast iron, but most tri-ply pans will work. Just beware that grease spatter can be hard to clean on a nice pan.
Heat oven to 500 degrees and place your pan on high heat. Blot the steak dry of any excess moisture and season liberally with salt and pepper. Turn on your vent hood and wait for your pan to get raging hot. A little water flicked into the pan should show beads of water dancing around and not evaporating very quickly. The pan should be hot enough that the water beads are hovering, not rolling. After the water is gone, swirl a tablespoon of oil into the pan and add your steaks, only one or two.
Now don’t touch ’em. Let the steaks cook until a clear and distinct crust is achieved. Your allowed to peek so you can gauge the crusts development. Once it looks evenly browned and delicious, flip and throw the whole pan in the oven. Cook for another 5-10 minutes depending on your thickness, then remove from the oven and place on a plate with the side that was on the pan, now facing up.

Slicing
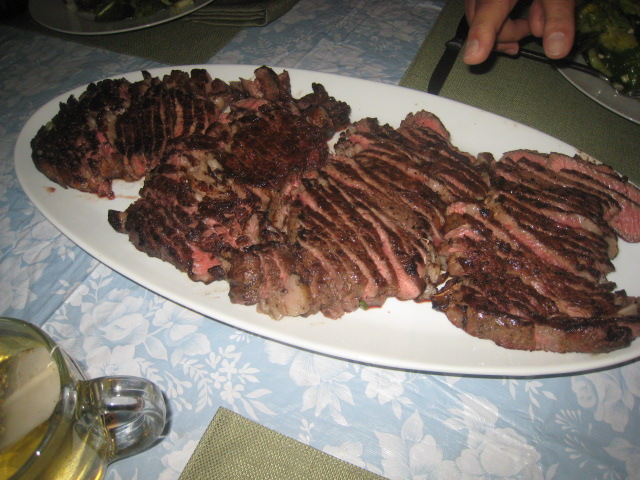
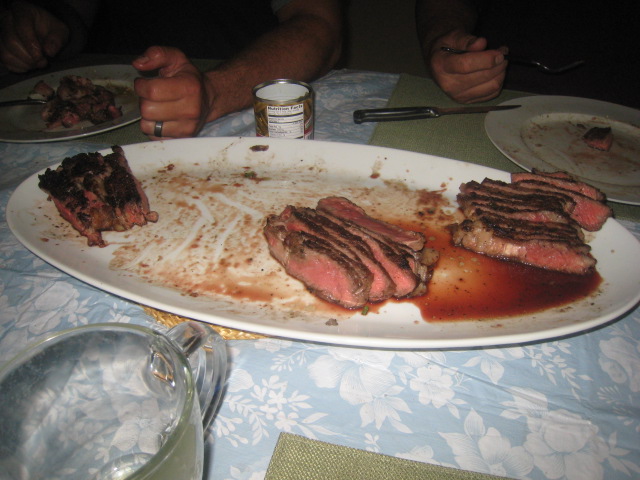
Always cut against the grain. More important for some cuts then others but pay attention to the direction of the muscle fibers. Very easy to see on a flank steak, the idea is to shorten those long strands. If you see the fibers running up and down, cut side to side. If the fibers are running side to side, cut up or down. And remember that thin is always better and a sharp knife makes thin easy.
One last thing. I like to slice my guests steak for them for a few reasons. I can cut it thinner and more efficiently on a cutting board with a big knife. Also, I can toss the slices in any accumulated juices and, I don’t like people to fumble around their plate improperly cutting their meat.
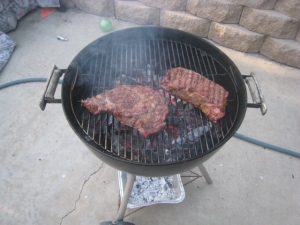
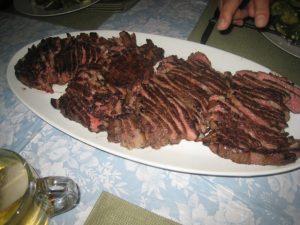
Pics
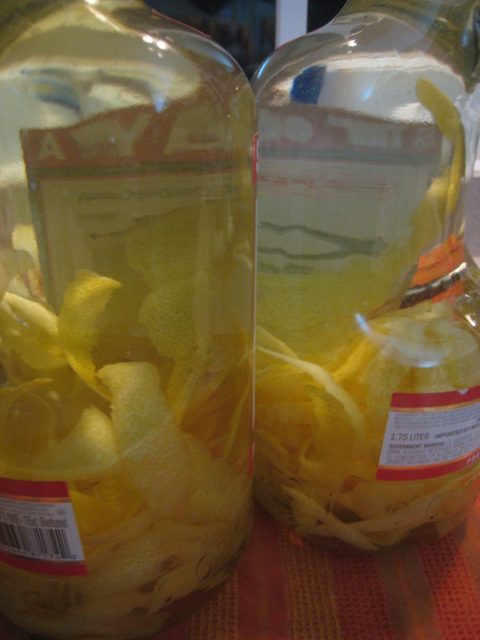
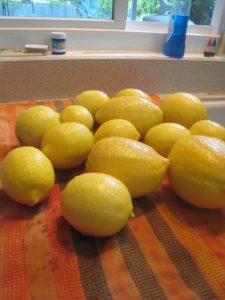 We thought it’d be fun to make limoncello, like the kind my mom brought back from Italy. But we don’t love our liquor sugary, so we went with a simple answer…lemon vodka.
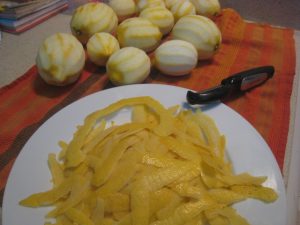


